Device Prep and Packing
It is vital that your devices are properly UNLOCKED & ERASED and then SHIPPED IN to ensure you receive the maximum value ASAP. Below are instructions to assist you with this.
Step 1: Preparing and Erasing your Devices


Unpairing & Erasing an Apple Watch
To prepare an Apple Watch for sale, it's crucial to first unpair and erase all content and settings. This process removes your personal information and restores the watch to factory settings. For GPS + Cellular models, you'll also need to decide whether to keep or remove your cellular plan.
Using your paired iPhone:
- Open the Watch app on your iPhone.
- Go to "My Watch" and select your Apple Watch.
- Tap the "i" icon next to your Apple Watch.
- Scroll down and tap "Unpair Apple Watch".
- Confirm that you want to unpair.
- Enter your Apple ID password if prompted.
- If you have a Cellular Apple Watch, choose whether to keep or remove your plan.
- The watch will be erased and reset to factory settings.
If you don't have your paired iPhone:
- Go to Settings > General > Reset on your Apple Watch.
- Tap "Erase All Content and Settings".
- Enter your passcode if prompted.
- Choose whether to keep or remove your cellular plan if you have a GPS + Cellular model.
- The watch will be erased and reset to factory settings.
Important Considerations
- Activation Lock - Unpairing your Apple Watch through the Watch app on your iPhone also removes Activation Lock. If you don't have your paired iPhone, you'll need to sign in to iCloud.com and remove the device from your list of devices there.
- Cellular Plan - If you have a Cellular Apple Watch, you may need to contact your carrier to cancel your cellular subscription after removing the plan from the watch.
- Travel Cards - If you've added a travel card to your Apple Watch, remove it before unpairing.
- Find My - If you turned on Find My on your Apple Watch, you may need to sign in to your Apple account on a computer to completely remove it.
Erasing your Smartphone
Erase Your iPhone / iOS Device
1) Sign Out of iCloud / Apple ID
This is critical to disable Activation Lock.
- Go to Settings > [your name]
- Scroll down and tap Sign Out
- Enter your Apple ID password to confirm
2) Erase All Content and Settings
- Go to Settings > General > Transfer or Reset iPhone
- Tap Erase All Content and Settings
- Confirm with your passcode or Apple ID
🧼 Final Tips
- Remove SIM card if it’s a physical SIM
- If using eSIM, you can choose to keep or erase it during the reset
- Unpair any connected Apple Watch or AirTags
Once erased, your iPhone will restart and show the “Hello” screen — ready for the next owner!
Erase Your Android Device
1) Remove Screen Locks and Accounts
To avoid Factory Reset Protection (FRP), sign out of your Google account.
- Go to Settings > Passwords & accounts (or Users & accounts)
- Tap your Google account > Remove account
- Also remove any PIN, pattern, or password under Settings > Security > Screen lock
2) Factory Reset the Phone
- Go to Settings > System > Reset options
- Tap Erase all data (factory reset)
- Confirm and follow the prompts
(Menu names might vary slightly depending on your Android version or manufacturer — Samsung, Pixel, Motorola, etc.)
🧼 Final Cleanup Tips
- Remove your SIM card and SD card
- Unpair any Bluetooth devices (like smartwatches or earbuds)
Packing and Shipping Tablets
Erase Your iPad / iOS Device
1) Sign Out of iCloud / Apple ID
This is critical to disable Activation Lock.
- Go to Settings > [your name]
- Scroll down and tap Sign Out
- Enter your Apple ID password to confirm
2) Erase All Content and Settings
- Go to Settings > General > Transfer or Reset iPhone
- Tap Erase All Content and Settings
- Confirm with your passcode or Apple ID
🧼 Final Tips
- Remove SIM card if it’s a physical SIM
- If using eSIM, you can choose to keep or erase it during the reset
- Unpair any connected Apple Watch or AirTags
Once erased, your iPad will restart and show the “Hello” screen — ready for the next owner!
Erasing Your Android Device
1) Remove Screen Locks and Accounts
To avoid Factory Reset Protection (FRP), sign out of your Google account.
- Go to Settings > Passwords & accounts (or Users & accounts)
- Tap your Google account > Remove account
- Also remove any PIN, pattern, or password under Settings > Security > Screen lock
2) Factory Reset the Tablet
- Go to Settings > System > Reset options
- Tap Erase all data (factory reset)
- Confirm and follow the prompts
(Menu names might vary slightly depending on your Android version or manufacturer — Samsung, Pixel, Motorola, etc.)
🧼 Final Cleanup Tips
- Remove your SIM card and SD card
- Unpair any Bluetooth devices (like smartwatches or earbuds)
Erasing your Laptop or Desktop Computer
Erase your Mac
1) Sign Out of Accounts
Before wiping your Mac, sign out of these services:
- iCloud:
- System Settings > Your Name > iCloud
- Scroll down and click Sign Out
- iMessage:
- Open Messages app
- Messages > Settings (or Preferences) > iMessage > Sign Out
- Apple Music / iTunes / App Store:
- System Settings > Your Name > Media & Purchases > Sign Out
- Bluetooth devices (if needed):
- System Settings > Bluetooth
- Disconnect any paired devices like a Magic Keyboard or mouse
2) Erase Your Mac
For Macs with Apple silicon (M1, M2, M3) or T2 chip:
- Shut down your Mac.
- Press and hold the power button until “Loading startup options” appears.
- Click Options > Continue.
- Enter your password if prompted.
- From the macOS Utilities window, open Disk Utility.
- Select your internal disk (usually called Macintosh HD).
- Click Erase, choose:
- Format: APFS
- Name: Macintosh HD
- After it finishes, close Disk Utility.
3) Reinstall macOS
- Back in the macOS Utilities window, choose Reinstall macOS.
- Follow the prompts to reinstall the operating system.
- When setup starts, shut down your Mac (don’t continue setup). This leaves it ready for the next owner.
Erase your PC
1) Sign Out of Accounts
Unlink your Microsoft account:
- Go to Settings > Accounts > Your Info
- If you're signed in with a Microsoft account, switch to a local account or remove it entirely.
- Deauthorize from services like iTunes, Microsoft Office, Adobe, etc.
2) Reset the PC (and Wipe the Drive)
This is the built-in method for wiping your PC and reinstalling Windows 10 or 11:
- Go to Settings > System > Recovery
- Under Recovery options, click Reset this PC
- Choose Remove everything
- When prompted:
- Choose Cloud download or Local reinstall
- Then, select Change settings and turn on:
- "Clean data" (This securely wipes your drive—do this if you’re selling the PC)
- "Delete files from all drives" if you want to erase additional internal drives
- "Clean data" (This securely wipes your drive—do this if you’re selling the PC)
- Confirm and click Reset
💡 This process can take a while but will wipe your personal data and reinstall a fresh copy of Windows.
3) Final Step: Power Down
Once the reset is complete and setup begins, turn off the PC. This way, the next owner gets the setup screen.
Erase your Chromebook
- Sign out of your Chromebook.
- On the login screen, press: Ctrl + Alt + Shift + R
- In the window that pops up, click Restart.
- After it restarts, select Powerwash > Continue.
- The Chromebook will reset itself and restart again.
Once done, it’ll show the initial setup screen for the next owner.
💡 Bonus Cleanup Tips: Remove the device from your Google Account:
- Visit https://myaccount.google.com
- Go to Security > Your Devices
- Find your Chromebook and click Sign out or Remove
If it’s managed by a school or business, contact your IT admin—you can’t remove enterprise enrollment on your own.
Step 2: Packing and Shipping your Devices


Packing and Shipping Apple Watches
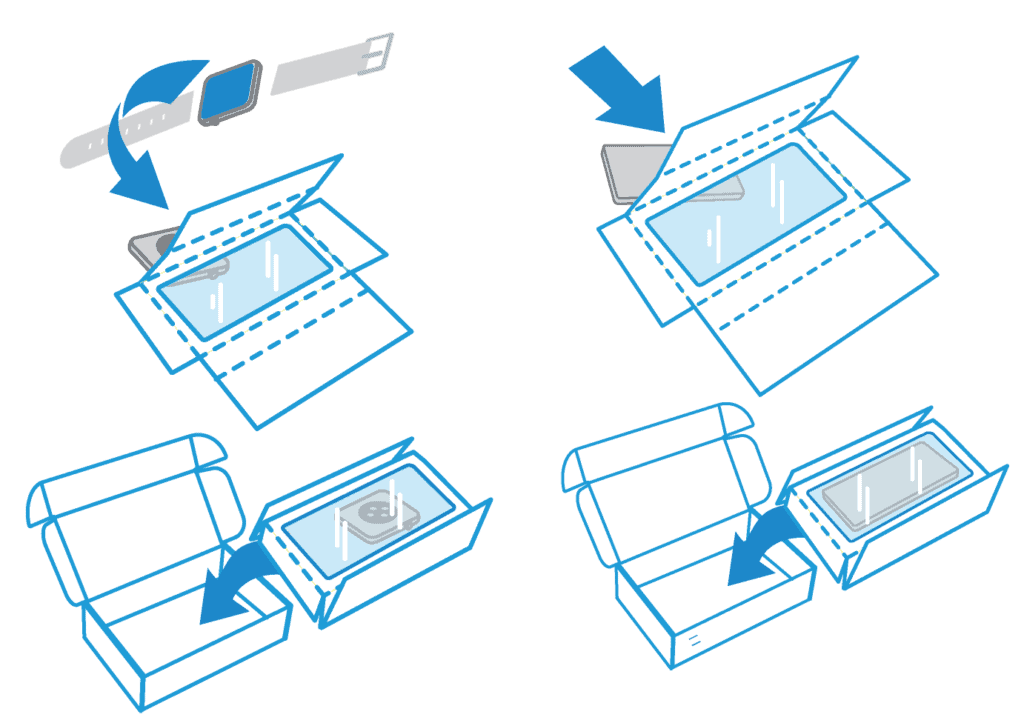
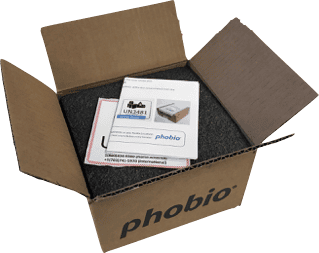
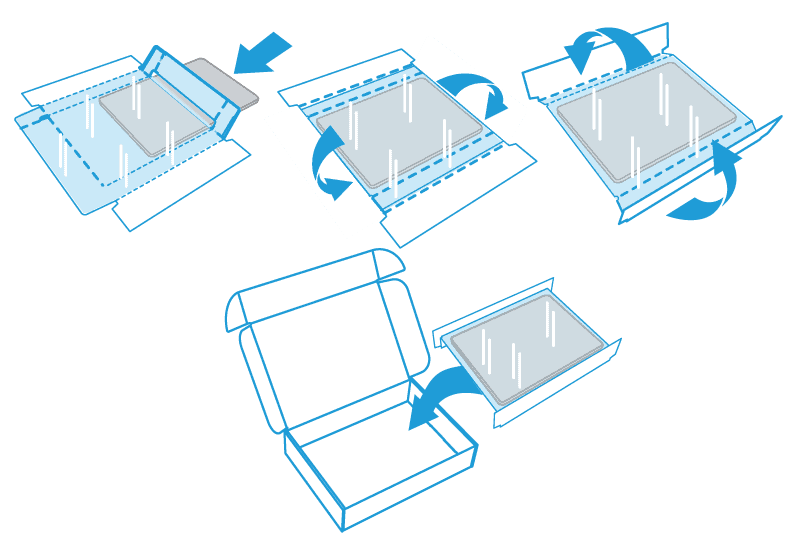
If a shipping kit was sent to you:
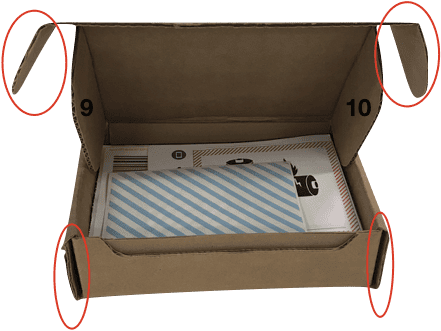
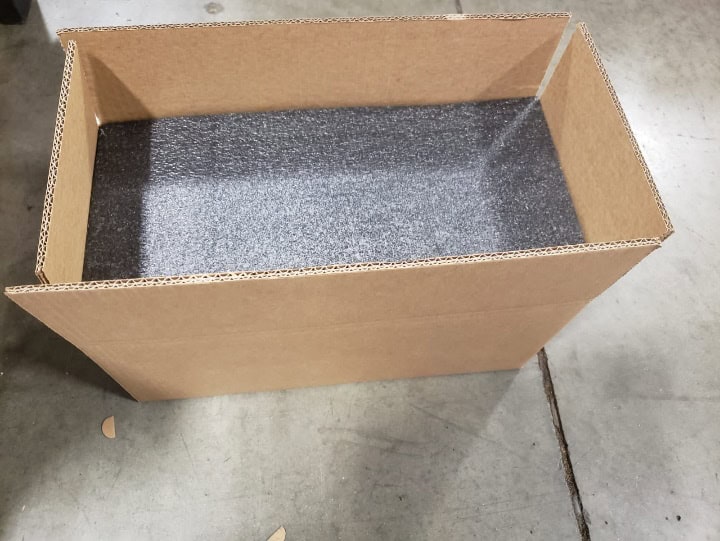
- Remove the cardboard insert from the box, and unfold right and left flaps to loosen the plastic sleeve attached to the cardboard insert. Place your device into the sleeve with the screen facing down. This reduces the possibility of transit damage to the screen.
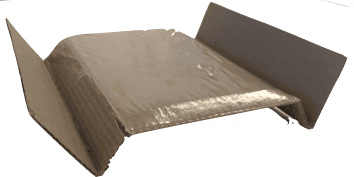
- Center your device inside the plastic sleeve. Re-fold both flaps to tighten the plastic sleeve around the device. Fold the first-half of the end panels down and second-half back up.
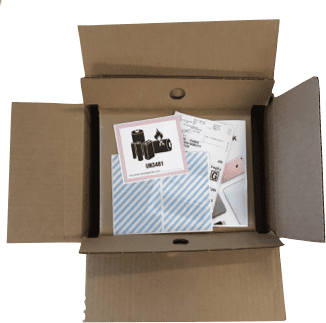
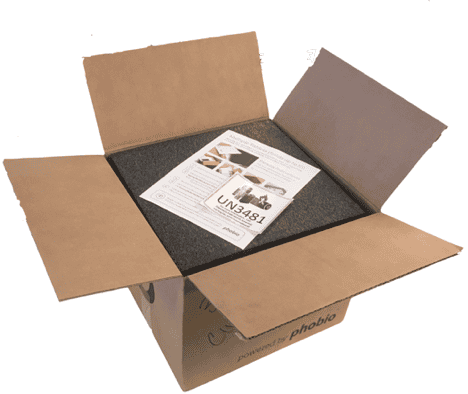
- Place the folded insert into the box. Any additional items included in the box will be recycled and cannot be returned to you.
- Finally, affix the Battery Label and Shipping Label to the outside of the box, and seal the box with the enclosed security tape.
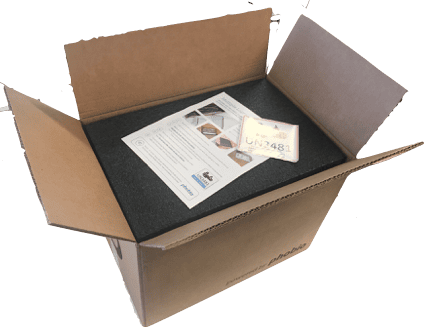
If shipping the device using your own box:
Packing and Shipping Apple Watches
Shipping a Single Device
If using a shipping kit sent to you:
- Remove the cardboard insert from the box, and unfold right and left flaps to loosen the plastic sleeve attached to the cardboard insert. Place your device into the sleeve with the screen facing down. This reduces the possibility of transit damage to the screen.
- Center your device inside the plastic sleeve. Re-fold both flaps to tighten the plastic sleeve around the device. Fold the first-half of the end panels down and second-half back up.
- Place the folded insert into the box. Any additional items included in the box will be recycled and cannot be returned to you.
- Finally, affix the Battery Label and Shipping Label to the outside of the box, and seal the box with the enclosed security tape.
If shipping the device using your own box:
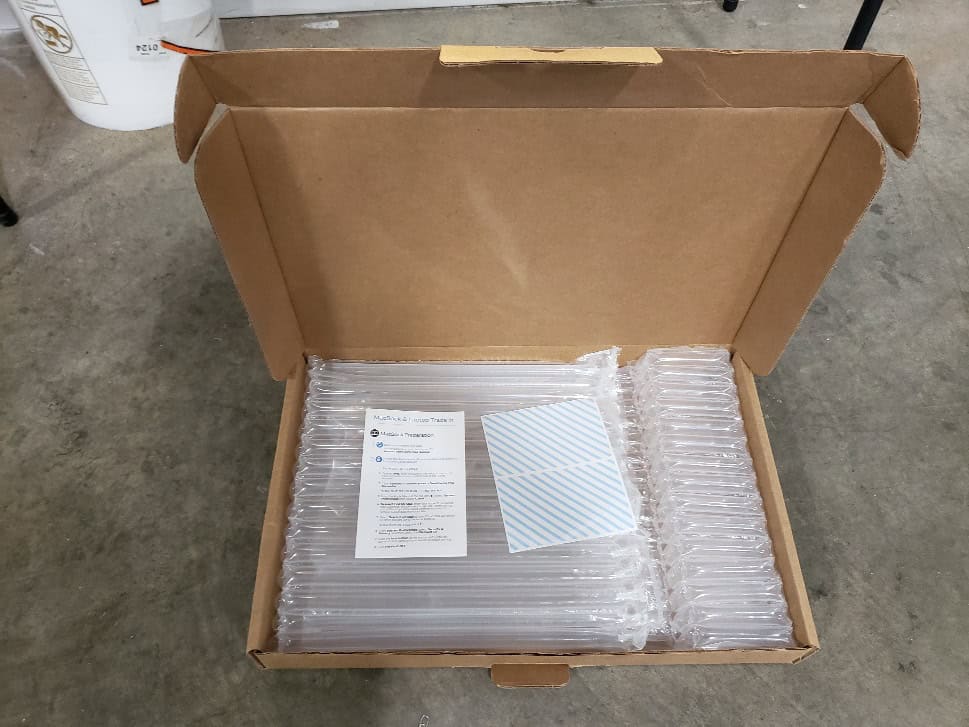
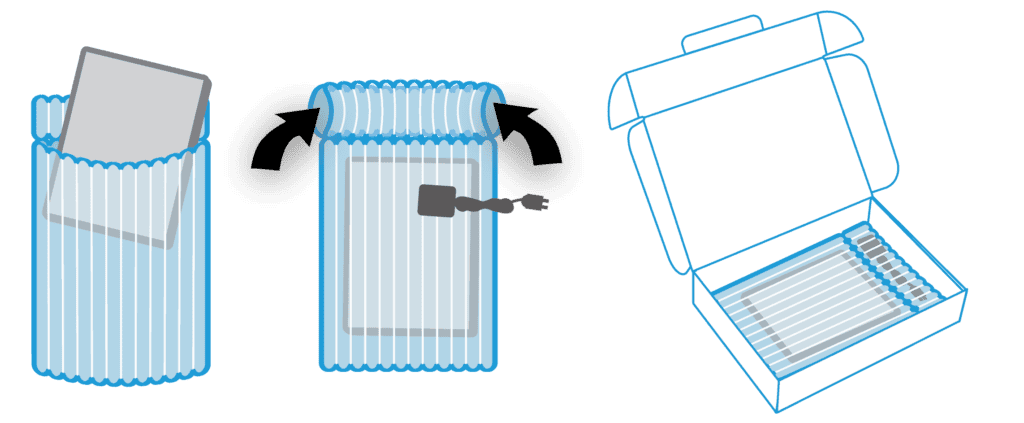
Shipping Multiple Devices
8-Count Phone Kit
- Insert devices into the partition spaces. Replace foam pad on top.
- Finally, affix the Battery Label and Shipping Label to the outside of the box, and seal the box with packing tape.

50-Count Phone Kit
- Insert devices into the partition spaces. Replace foam pad on top.
- Finally, affix the Battery Label and Shipping Label to the outside of the box, and seal the box with packing tape.

Packing and Shipping Tablets
Single Tablet Box
- Flatten the insert, film side up, and gently slide the device under the film.
- Place your device into the sleeve with the screen facing down. This reduces the possibility of transit damage to the screen.
- Fold the long side panels under 180-degrees until they touch the bottom-side of the insert. Fold the first-half of the end panels down and second half back up.
- Place the folded insert into the box. Any additional items included in the box will be recycled and cannot be returned to you.
- Finally, affix the Battery Label and Shipping Label to the outside of the box, and seal the box with the enclosed security tape.

10-Count Tablet Kit
- Insert tablets in the bubble mailers then slip into the partition spaces.
- Replace foam pad on top.
- Finally, affix the Battery Label and Shipping Label to the outside of the box, and seal the box with packing tape.


Packing and Shipping Laptop and Desktop Computers
Single Laptop Box
- Insert your device into the large pocket. Secure your accessories by sliding them through either opening on the end of the padded envelope.
- Place the padded envelope flat inside the box.
- Finally, affix the Battery Label and Shipping Label to the outside of the box, and seal the box with the enclosed security tape.
Prevent overlap for png images
5-Count Laptop Kit
- Insert laptops in the bubble mailers then slip into the partition spaces.
- Replace foam pad on top.
- Finally, affix the Battery Label and Shipping Label to the outside of the box, and seal the box with packing tape.

Pack and ship your iMac